Tecelite
TECElite is an unofficial client that that was created by a dedicated community member named KimJongUgh that makes use of AdiIRC which is a free to use program very similar in nature to mIRC. This client offers far more customization than the official Orchil client. As of now, the only way to download a copy of this client is by to the #unofficial-clients channel of the community Discord. The most recent copy of the client can be found in the stickied topics. Members can also help solve and issues you have using the client.
More information to follow soon.
(rough draft being worked on)
How to connect to the TEC server:
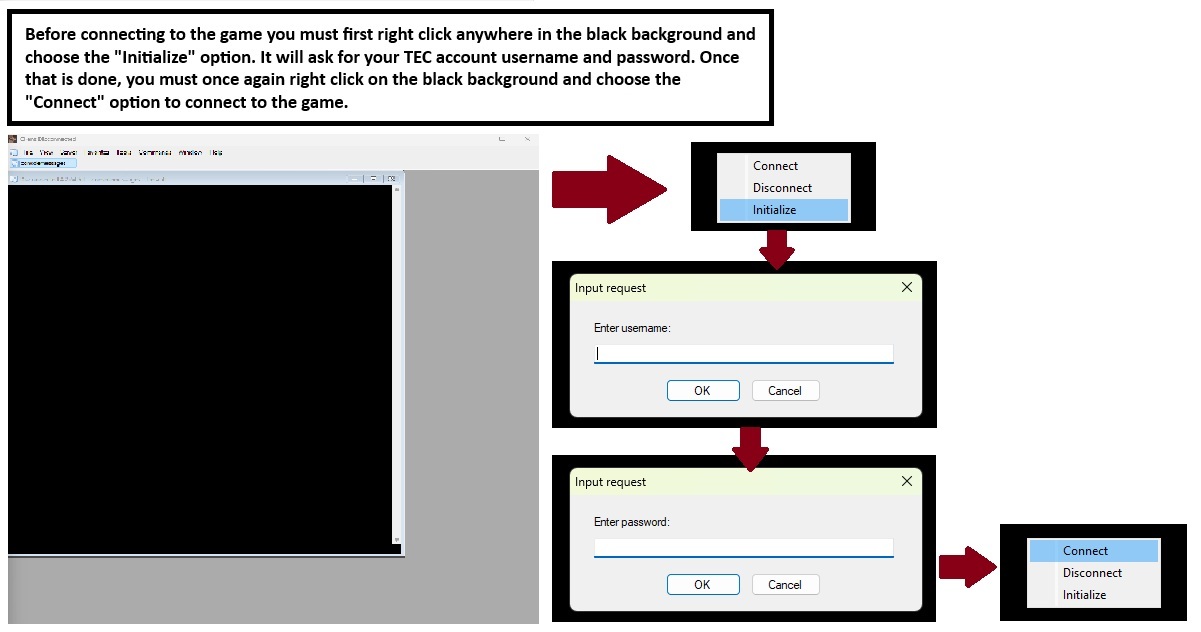
The process to login to the game is different from using Orchil; you will instead right-click anywhere on the black background and then click on "Initialize". You must enter your username and your password to create the cookie used to log into the game (same process that is used when logging in from the TEC website). You will not have to complete this step again unless you log into TEC's website with your TEC account. TECElite uses the same MD5 Hash method that Orchil uses to encrypt your password - it uses the same login process and takes the hashed password from the cookie. Your password will NEVER be stored in plain text in any of the TECElite files, it is simply used to create the initialization process that is required to create the cookie and it is then erased. Once the initialization process is done, you can simply right click on the black background and then click on "Connect". You will now enter the game.
/player functionality
With v1.4 comes individual file saving for each of your character slots. You can now save preferences and assign them directly to a character slot, but to do so you must use the /player # system which is quite simple. In the Welcome Area, simply type in /player followed by the number of the character you wish to play (ex: /player 2). It will send the PLAY 2 command which will make you use that character slot AND load all of your related preferences and saved data for that specific character. By default you will see 10 text files in the TECElite folder labeled playerstorage1.txt, playerstorage2.txt, etc. all the way to playerstorage10.txt. More text files can be created to accommodate for more character slots. Now if you wish to save all of your preferences and data to the text file, you must use the /saveplayer command OR you can also use the /sleep command which will make your character sleep AND save everything to the text file. You can also launch the /initplayer command while a profile is loaded to easily set all of that character's preferences.
Commands:
/player # (i.e. /player 2) : Sends the PLAY command while in the Welcome Room and loads all preferences/data.
/initplayer : Launches the initialization process for all scripting preferences.
/resetplayer : Sets all of the preferences/data associated with the currently loaded playerstorage.txt file to default values.
/saveplayer : Saves all of the preferences/data associated with the currently loaded playerstorage.txt file.
/sleep : Sends the SLEEP command while also launching the /saveplayer command.
User Interface
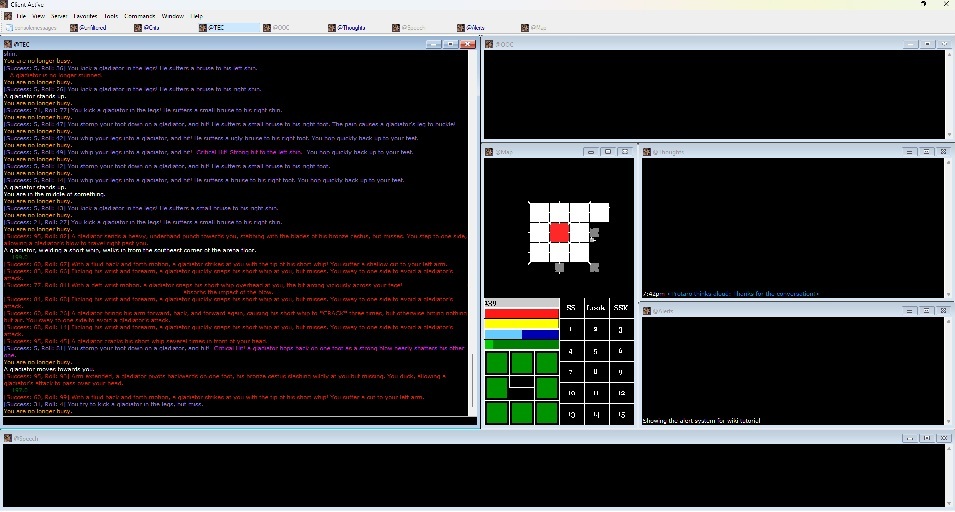
The user interface (UI) is customizable and allows you to change the map from two styles (vertical aka classic or horizontal). You can also remove the borders from the windows or leave them on. By right clicking in the main @TEC window, you will see "Client Preferences". From there, "Fonts / Windows" will allow you to choose your desired font and font size, but will also have the option for borderless windows. Under "Client Preferences" you will also see "Map Pref" -> "Classic" or "Horizontal" are the two options for the map area which also contains the macros.
Classic map with borders:
Horizontal map without borders:
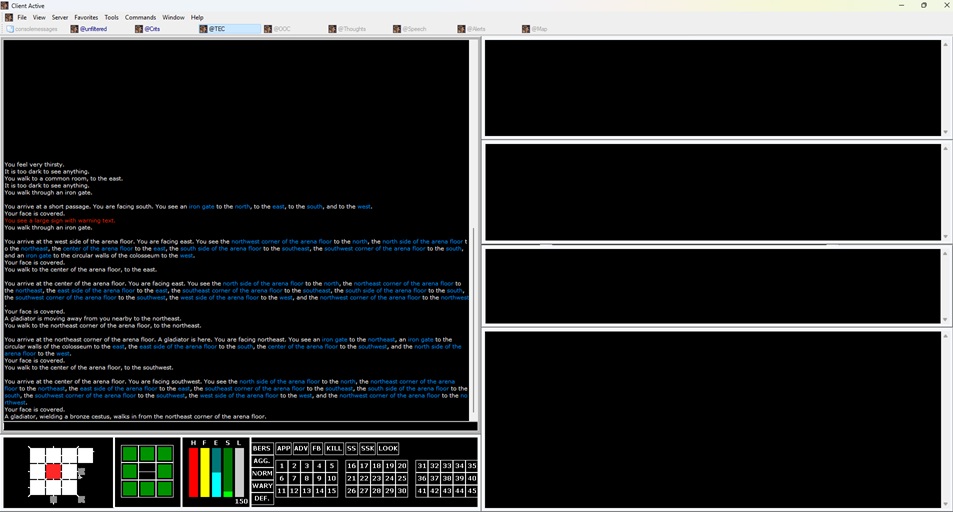
Note: if using the horizontal map style, you will need to use the macro system to make use of the APP, ADV, FB and KILL buttons. All of the buttons from 1-45 NEED to use the fe1, fe2, fe3, .. fe45 macros as it sends those commands. It functions the same way in Orchil.
Step 1: @macro feapp
Step 2: when prompted "Enter the string ..." you need to type in: app
Repeat the same process for @macro feadv (advance
Save Screen Positions
The user interface (UI) is customizable based on your preferences. You will have access to several windows which you can move and resize as desired. These windows include: @TEC (everything that comes from the game), @Crits (only critical hits will show here, both the ones you do and receive), @OOC (everything that happens in the OOC channel will show here), @Thoughts (every single message sent to the think channel will be here), @Speech (all messages that include speech will be here), the @Map window with the compass, map and macros, and @Alerts (various important information).
Once all of the windows have been set to your preferences, you must right click on the @TEC window and then click on "Save Screen Positions" to save all of the windows. Whenever you will close and re-open the client, they will be set to your personal preferences.
Scripting
With v1.4 comes the ability to script. You can easily build and use combat or non-combat scripts which both behave differently. The combat script runs an advanced scripting system that will not only let you send out your attacks, but will also respond to a vast range of situations similarly to what the TEC Extender does. Before making a combat script and using any of them, you will have to use differently colored echoes for both the incoming and outgoing combat prose. As you can see in the example below.

If you're not already familiar with the color menu, here is how to use it. When logged into your desired character, use the @colors command which will open the Color Menu where you can set your Offensive and Defensive Combat colors.
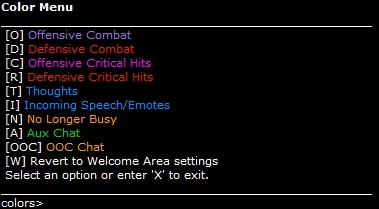
If you already have your colors set up, you still need to use the @colors command otherwise scripting will NOT work. TECElite must fetch your color scheme and it can only do it and properly save them so scripting can begin once you use the command. You only need to do it once. If you have different colors on different characters, you will need to use the @colors command -everytime- you wish to use combat scripts. For ease of use, it is highly recommended that you use the same color scheme for all characters. If you are not receiving colors while in combat in your client, you must turn them on using the PREF command. pref > Q will set it on ([Q] Colorized Combat Echoes [on]).
List of macros that need to be set on each of your characters: (add only the appropriate ones - use @macro to add them)
Kill command: fekill: kill
Use Advance to approach: feadv: adv
Use approach to approach: feapp: app
Use Custom Approach preference: customapproach: yourskill
Falx kill preference: falxkill: fslash
Use 2HC Charging Upswing after Forward Slam: fecupswing: cupswing
Use Cestus Upthrust to stand: feupthrust: upthrust
Now that all of the above has been completed, we can begin building scripts. The best way to use the system is to preset all of your attacks in macros and using
For the Sword skillset:
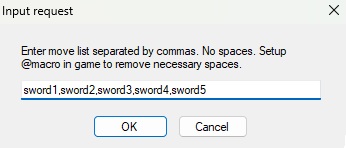
@macro - A - sword1 - slash
What this does is make it so that when you send the sword1 command to the game, it will convert it into slash
You will now have to use the TARGET command to set up your target(s). So for instance, if you went to the sewers, you would set it up as: target ooze|snake|osecar|rat and it will attack the first target in the room with any of those names that can be targetted. As you change hunting grounds, you can easily set new targets without having to change any of your scripts.
Now that the base has been explained, we can now move to building scripts. The combat script already contains everything it needs in order to operate, so all you must do is feed it your attack rotation. Using right-click on the @TEC window, choose Combat Scripts -> Build Combat Script.
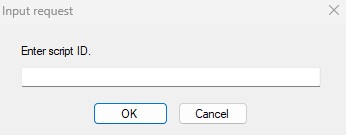
Enter your Script ID:
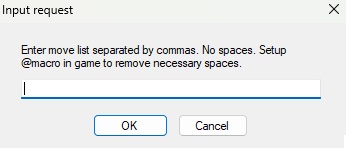
Enter your move list:
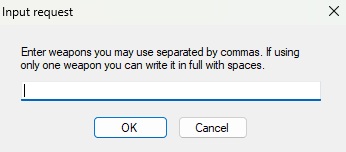
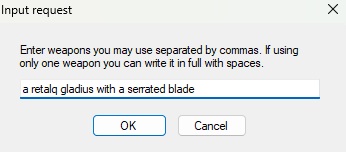
Enter your weapon list: (you can enter one full weapon name with spaces OR enter multiple one-word names)
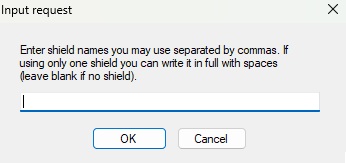
Enter your shield name: (you can enter one full shield name with spaces OR enter multiple one-word names)
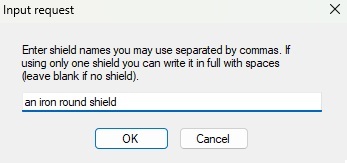
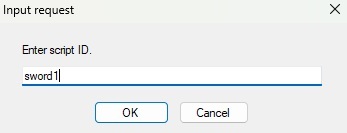
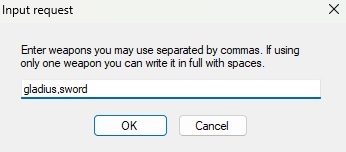
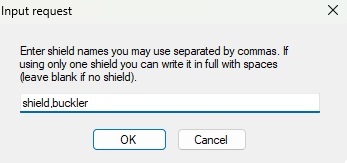
You have just built your first combat script! It's that simple, all you have to do is fill out that information and you're done. To launch the combat script, you can either Right-Click in the @TEC window -> Combat Scripts -> Launch Combat Script or you can quickly launch it using /fight sword1
- Combat Priority based on Target Command: when turned to "ON" this will make combat priority effective. This is a very complex system that allows you to choose your target priorities and will change targets dynamically without your input required. The order in which you set your targets using the TARGET command will decide which targets will have the priority: target ooze|snake|osecar|rat will set your targets in the order which they will be attacked. In that example, ooze is #1, snake #2, osecar #3 and rat #4. If you are fighting a rat and an ooze comes in, it will target the ooze automatically. Once the ooze is defeated, it will attempt to find a new target and choose accordingly. Priority 0 is given to targets that are either unconscious or fall unconscious which overrides all other priorities. You can change this setting in Right-Click -> Scripting -> Scripting Preferences -> Combat Priority based on Target Command
Client Preferences
When using right click on the main @TEC window, you will see an option called "Client Preferences" -> "Client Preferences". Clicking on this will pop up a menu to turn several different settings on/off. Most of these settings are self-explanatory:
- Display think in main window: turning this to "OFF" will only display the think channel messages in the @Thoughts window
- Display OOC in main window: turning this to "OFF" will only display the OOC channel messages in the @OOC window
- Display entered command: turning this to "ON" will show the entered command in the @TEC window
- Condensed think echo: turning this to "ON" will remove the "thinks aloud" part of the echo
- Filter and remove all NPC Speech: turning this to "ON" will remove all of the banter/regular combat NPC speech so you can focus on combat instead. (not all NPC speech has been added yet so some is still there)
- Keep NPC Speech in @Speech when filtered: turning this to "ON" in conjunction with the above function will remove all of the speech from the @TEC window, but will still send it to the @Speech window.
- Notification when NPC speech is removed: turning this to "ON" will send a "Speech Removed from NPC" notification in the @TEC window when NPC speech has been removed.
- Beep alerts ON/OFF: this function was added to allow the user to hear a beeping sound when certain things happen, such as reaching 4% fatigue, reaching 50% health, reaching -50% fatigue and other things that are currently hard-coded into the client. The beeping interval/length is different for each of these thresholds.
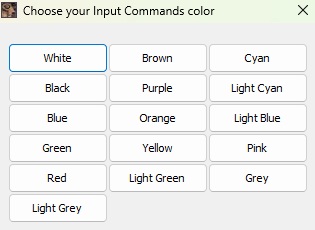
Commands input color: can be accessed from right-click->client preferences->commands input color. Allows you to choose 1 of 16 preset colors for the commands you send. This function will be overwritten by the script color if there is an active script. You must have "Display Entered Command" set to "ON" for this to take effect.
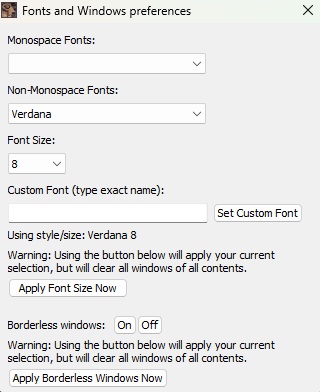
Font / Windows: can be accessed from right-click->client preferences->font/windows. Allows you to easily set your font, font size and the option to turn borderless windows on. The list of fonts is relatively small, but you can enter your own custom font name in the designated box to change it. This function, unlike the regular /font command for AdiIRC allows you to change the text for all of the windows. If you want to change the font or borderless windows, you will lose ALL of the current content in those windows when applying the change and that is because a reload is required for them to take effect. Using a monospace font is recommended as it will make all of the various things line up properly (stock list, stats, all game menus, etc.)
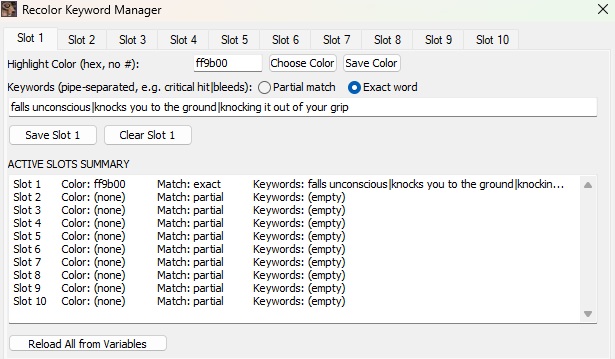
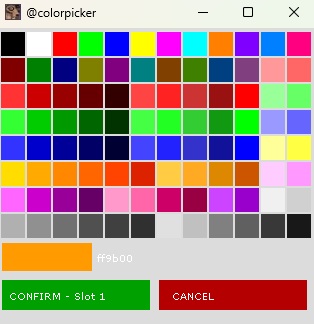
Recolor Manager: can be accessed from right-click->client preferences->recolor manager. Allows you to change the color of certain phrases, keywords, etc. into a hex color of your choice or you can choose one of 96 preset colors. There are 10 slots available in which you can choose the color and text to change colors for. The option for a "partial" match allows you to target parts of a word instead of a full exact match, i.e.: tin -> if partial match is used, it will highlight every single instance of TIN in any words, the "tin" in interesting would be highlighted and not the full word. Exact words require a full match which means that only instances of "tin" on its own would be highlighted. You can highlight words or phrases.
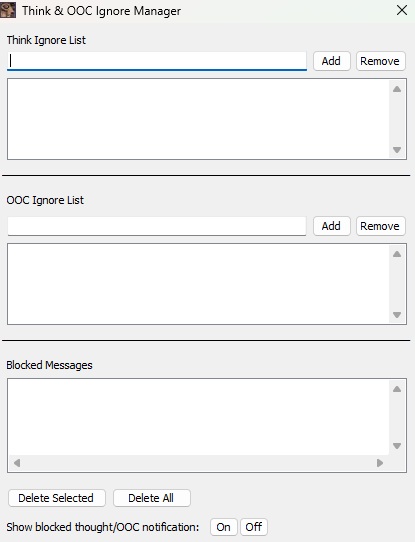
Ignore List Manager: can be accessed from right-click-> client preferences->ignore list manager. Allows you to easily add/remove people from the think or OOC channels in your game client. The list of people on the ignore lists will show in alphabetical order. There is a blocked messages section at the bottom that allows you to view any messages that were sent by the people on your ignore list. It will tell you if it comes from the THINK or OOC channel as well. A maximum of 100 messages can be stored and you can delete singular messages by clicking on them or delete all of them at once. If "Show blocked thought/OOC notification" is set to "ON" you will be notified in both the @TEC window and the @Thoughts or @OOC window that a message was blocked.
Scripting Preferences:
Can be accessed using right-click->scripting->scripting preferences. Everything here is rather simple and straightforward. Most of these settings are saved directly in the active playerstorage file, so if you wish to have it set up per character and have it retain its memory without having to always set it back, you MUST use the /player # and /saveplayer (or /sleep) commands.
- Combat Script Debug Mode: turning this to "ON" will send all debug functions to the @TEC or @Alerts windows. This is incredibly spammy, but allows you to see what is going on and allows the ability to troubleshoot if certain issues arise.
- Use combat advance: turning this to "ON" will make you use combat advance over the basic approach command during scripts
- Kill automatically: turning this to "ON" will make you use the killing blow command automatically when your target falls unconscious during scripts
- Use Custom Approach: turning this to "ON" will make you use the customapproach macro to make you use a variety of skills that can approach a target to you. You must first "@macro customapproach" and set it to whatever skill you wish to use, i.e.: falx: break
, chainblade: raptor , nelsor: kleap - Continue Attacking on KO: unlike the KILL AUTOMATICALLY function, this one allows you to keep attacking with your regular attack(s) while the target is unconscious. This is something that was added in for testing game mechanics.
- Falx: Use Final Slash to kill": when an enemy falls unconscious, the script will send the falxkill command if this is set to "ON". You MUST set a macro for falxkill as follows: falxkill: fslash
- Use Backwards Rise to stand: if set to "ON", in certain situations where your character needs to stand, it will use brise to do so.
- Cestus: Use Upthrust to stand: turning this to "ON" will attempt to use upthrust to make your character stand. You MUST create a macro for it by using: feupthrust: upthrust
. - Sling: Use Speedload: instead of using the "load" function, this allows your character to use speedload instead. Depending on your ranks in the skill, it can be faster to use speedload rather than the basic load function
- Noncom: Stop script when attacked: as the name implies, when this setting is turned to "ON", you will stop your non-com script immediately upon being attacked. This can be useful when using the outdoors skills or herbalism in dangerous areas.
- Assume Weapon Combat Stance manually: set to "ON" by default, if you don't have 80 ranks in your combat stance certain skills will require you to enter stance before performing them. Your script will attempt to enter the desired weapon combat stance when required.
- Def. Combat Stance: this setting is to set your desired DEFAULT combat stance. If for any reason your character's stance is modified (fumbling, critical hits, etc.) it will change your stance once able to the default combat stance. This setting is set to NORMAL by default.
- Combat Priority based on Target Command: when turned to "ON" this will make combat priority effective. This is a very complex system that allows you to choose your target priorities and will change targets dynamically without your input required. The order in which you set your targets using the TARGET command will decide which targets will have the priority: target ooze|snake|osecar|rat will set your targets in the order which they will be attacked. In that example, ooze is #1, snake #2, osecar #3 and rat #4. If you are fighting a rat and an ooze comes in, it will target the ooze automatically. Once the ooze is defeated, it will attempt to find a new target and choose accordingly. Priority 0 is given to targets that are either unconscious or fall unconscious which overrides all other priorities.
- Show Script Output Commands: turning this to "ON" will show the commands sent in real-time by the running script. You can choose 1 of 16 preset colors you want it to be by using the right-click menu -> scripting -> script output color.
- Only show Output for Combat Scripts: turning this to "ON" will only show the commands sent in real-time by the combat script. Must be used in conjunction with the Show Script Output Commands setting. Turning this to "OFF" will make utility scripts, non-combat scripts and combat scripts show their output commands.
- Stall Protection Timer: this setting is set to 6 by default, but can be changed as desired. Changing this setting may lead to unsatisfying results depending on your character's actions roundtime. The stall protection timer is used in combat so that if for some reason the script stalled, it will kick back up when being attacked.
- Use 1wield command, two-handed weapons: turning this to "ON" will send the 1wield command instead of the regular wield command. This is particular useful for the hoplite skillset, but can also be used for other two-handed weapons in certain scenarios where you may want to wield the weapon in only one hand (can be useful if you want to keep a lantern in one hand).
- 2HC: Use C.Upswing after F.Slam: turning this to "ON" will make you automatically use the Charging Upswing skill after a successful Forward Slam.
TEC Elite Commands:
/player # (example: /player 2)
This command is used while in the Welcome Area to designate the character that you are going to play in order to load that character's combat data and preferences associated with it. It will make you enter the gameworld with the character assigned to the # used in the PLAY menu.
/initplayer
Logging into the game when using the /player # command will warn you if the character you are currently using has not yet been initialized. The initialization process will take you through a few pop-ups to save certain preferences associated with said character. Right now it includes: combat advance, custom approach and falx kill.
/saveplayer
This command will save all of the current combat data and the preferences associated with the character to the appropriate file. The system has been designed to have up to 10 text files that will store character data individually. These text files can be found in the main folder and will be labeled playerstorage1.txt up to playerstorage10.txt and the text file currently in use to store the data will be designated by the /player command used previously.
/sleep
This is a combination of the /saveplayer command, but it will also make your character sleep at the same time.
/resetplayer
This command will completely erase all of the saved combat data and preferences for the active text file as designated by the /player # command.
/font
AdiIRC command used to change the font and text size of the main @TEC window. Keep in mind that if you want to have perfectly spaced out SKILLS and STATS outputs you will need to use a monospaced font. Everything else will generally look fine even without a monospaced font. Here is a list of the base fonts available that are monospaced: Consolas, Courier New and Lucinda Console.